For data analysis and exploration, Jupyter/IPython notebooks has often been the tool of choice for its ease in sharing work and explaining the thought process. If your data resides mainly on BigQuery, there are a couple of steps required to set up the authentication to access your data directly on the notebook. This can sometimes get a little confusing and messy.
With Colaboratory, connecting Google Cloud Platform products to a notebook on a cloud that teammates can access and collaborate on in real time is now really easy. Colaboratory is basically Jupyter notebooks on Google Drive with couple more cool features (free TPUs, anyone?). And just with other Google Drive products, this is free! This post is about how you can connect BigQuery to Colab in a few minutes and dive straight into the data.
Prerequisite: Have Google Cloud Platform project already set up
Here’s a step by step guide on creating a Colaboratory notebook on Google Drive and connecting BigQuery to your notebook within minutes. Most of it is similar to the guide here: https://colab.research.google.com/notebooks/bigquery.ipynb
1. Add the Colaboratory add-on to your Google Drive
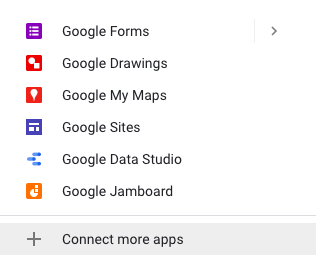
Open your drive. Click on New > More > Connect more apps
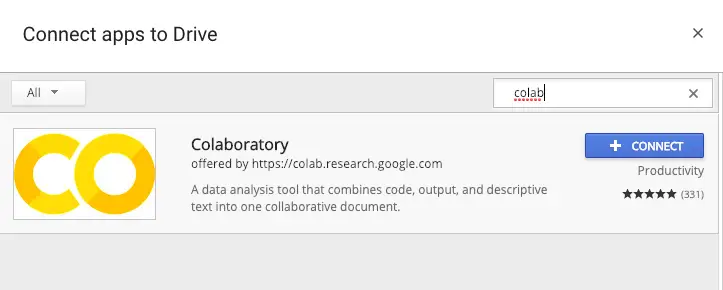
Search for Colaboratory and click on + CONNECT.
If you go back to New > More, you will now see Colaboratory as an option. Click on it to start a new notebook.
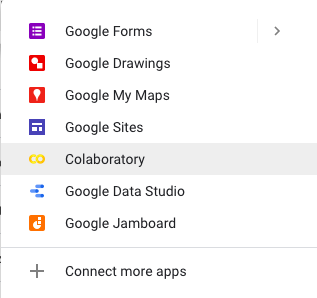
This is how it will look like:

2. Make sure BigQuery API is Enabled
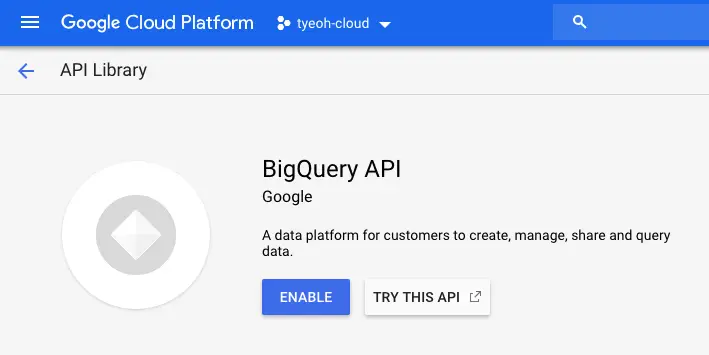
Open your Google Cloud Platform console. Make sure you are on the correct project (active project is shown beside ‘Google Cloud Platform’ on the top left). From the search bar at the top center of the page, search for BigQuery API to go to the BigQuery API page.

If you see the option to ‘DISABLE API‘, it means BigQuery API has been enabled and you do not need to take any action.

On the other hand if you see the option to ‘ENABLE‘, it means BigQuery API is not enabled on your project yet. Just click on ENABLE, wait a few minutes till everything has loaded.
3. Google Cloud Platform authentication
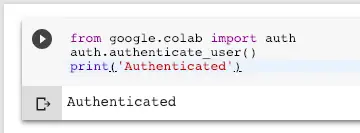
Head back to your notebook and enter this in the first cell:
from google.colab import auth
auth.authenticate_user()
print('Authenticated')
Run the cell. There are a couple of ways. On Mac:
1. control + enter OR command + enter OR clicking on the arrow to the left of the cell runs the cell only.
2. shift + enter runs the cell and and moves the cursor to the next, if there is one. If there isn’t a next cell it will create a new cell and move the cursor there.
3. option + enter runs the cell, inserts one cell directly below it, and moves the cursor to that new cell.
Soon you should see a prompt like the one below:
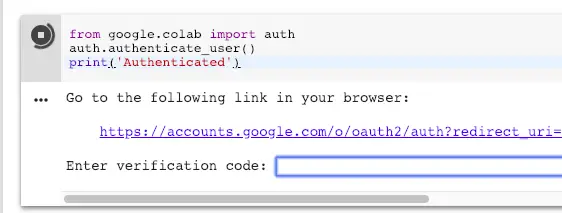
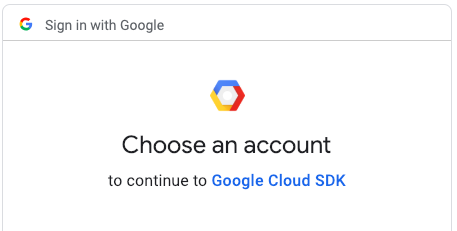
Click on the link to open the authentication page, which should look like this this screenshot below. Your signed in Google accounts will show up on that page too. Click on the account which is associated with the Google Cloud Platform project.
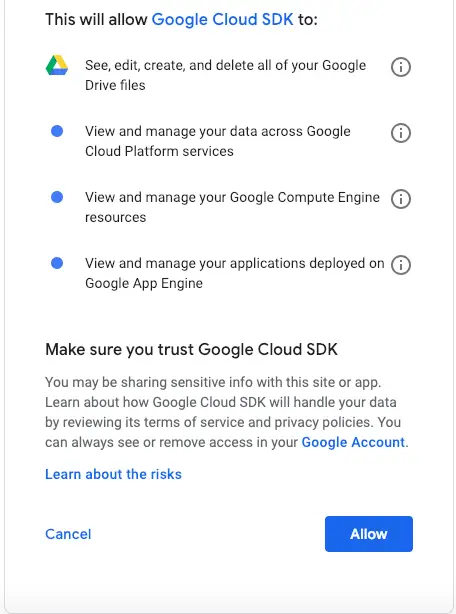
The next page will inform you of the permissions that will be granted to the notebook. Click on Allow once you’ve viewed them.
Finally you’ll arrive at this page below where there is a string of characters. Click on the copy icon to the right, then navigate back to your notebook.
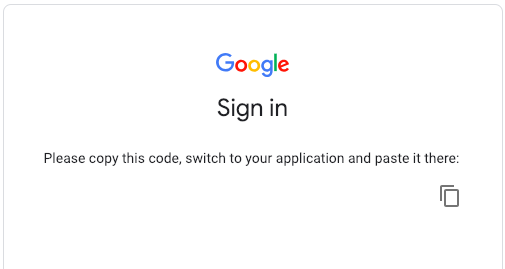
Paste into the field ‘Enter verification code:‘ and hit Enter. You’re now authenticated!
4. Run queries and create dataframes with magics
The easiest way to create dataframes from BigQuery queries is via magics, which, as its name suggests, is magic! Using the documentation page’s example:
%%bigquery --project yourprojectid df
SELECT
  COUNT(*) as total_rows
FROM `bigquery-public-data.samples.gsod`
Start your cell with ‘%%bigquery‘, change ‘yourprojectid‘ to your project’s id, and ‘df‘ to the name of the variable you want to contain your dataframe. Enter your query, run the cell, and you have your dataframe! Really simple, not much to explain here.
Personally I needed more parameters than that, such as being able to toggle between legacy and standard SQL, and showing job details. Some of that is available in magics too, just by adding arguments to the command. To use legacy sql add the flag `–use_legacy_sql‘. By default job id and running times are cleared when the job is complete. To leave both there just add the flag ‘–verbose‘:
%%bigquery --project yourprojectid --use_legacy_sql --verbose df
SELECT
  COUNT(*) as total_rows
FROM [bigquery-public-data:samples.gsod]
More details on the available flags in magics can be found here https://googleapis.github.io/google-cloud-python/latest/bigquery/generated/google.cloud.bigquery.magics.html.
5. Get job details via Google Cloud Python Client for BigQuery
Sometimes you might want more details about the job, such as the amount of data processed and billed. For the full range of details related to the job you’ll need the BigQuery Python Client. Here’s a code snippet you can use to get the amount of data processed and billed for a specified job.
project_id = "your project id"
from google.cloud import bigquery
import humanize
client = bigquery.Client(project=project_id)

job = client.get_job("job id returned from previous step")
bytes_processed = humanize.naturalsize(job.total_bytes_processed, binary=True)
bytes_billed = humanize.naturalsize(job.total_bytes_billed, binary=True)
print('%s processed, %s billed (%s)' % (bytes_processed, bytes_billed, job.ended - job.created))
For a full list of possible attributes relating to the query job that you can access, refer to attributes in this document: https://googleapis.github.io/google-cloud-python/latest/bigquery/generated/google.cloud.bigquery.job.QueryJob.html
That’s all I have for creating a Colab notebook on Google Drive, authenticating BigQuery, running queries and getting job details. More fun with Colab and BigQuery soon!
How do I get my “projectid”?
Hi Jason, there’re a couple of ways do that, 2 of them here:
1. From the cloud console (https://console.cloud.google.com/), on the top left, to the right of ‘Google Cloud Platform’, you’ll see the active project’s name. Click on it and a pop up will appear. Within that pop up you’ll find a list (or one) project name with the corresponding project id. Select the ID of the project you are using BigQuery with.
2. From the BigQuery UI (https://console.cloud.google.com/bigquery), on the left sidebar, below ‘Search for your tables and datasets’ search bar, there’ll be your project ids listed (if you are in the new UI). If you are in the old UI, below the search bar is the project name. Hover over it and you’ll see your project id.
Hope this helps. Cheers!
How do I set the project id once in the file, not at every bigquery section?
Hi Marton, to do that, you’ll need to use BigQuery through google-cloud-bigquery. There’s a detailed guide here, under ‘Use BigQuery through google-cloud-bigquery’. You’ll just need to declare the client and associated project-id once, and after that just call client.query for different queries. Enjoy!
Is there a way to automate login? Any ideas how to set this up with a cron job?
Hi Kathy, sorry I have not tried that before but it does sound like an interesting idea.
Hi
How can I use parameter interpolation like in jupyter I can do
%%bigquery –params $queryParams
where queryParams is a dict
Thanks
Hi Richard, unfortunately I have not touched BigQuery in Colab for awhile and can’t recall if that’s possible. Sorry about it!